As I prepare to haul out all the autumn and Halloween decorations for the season, I couldn't resist putting together a DIY tutorial, mixing tarot with some fun and easy Yankee folk crafts. In this post, I'll show you how to make your own autumn garland with tarot prints, pressed leaves, and fabric scraps.
Gather Your Supplies:
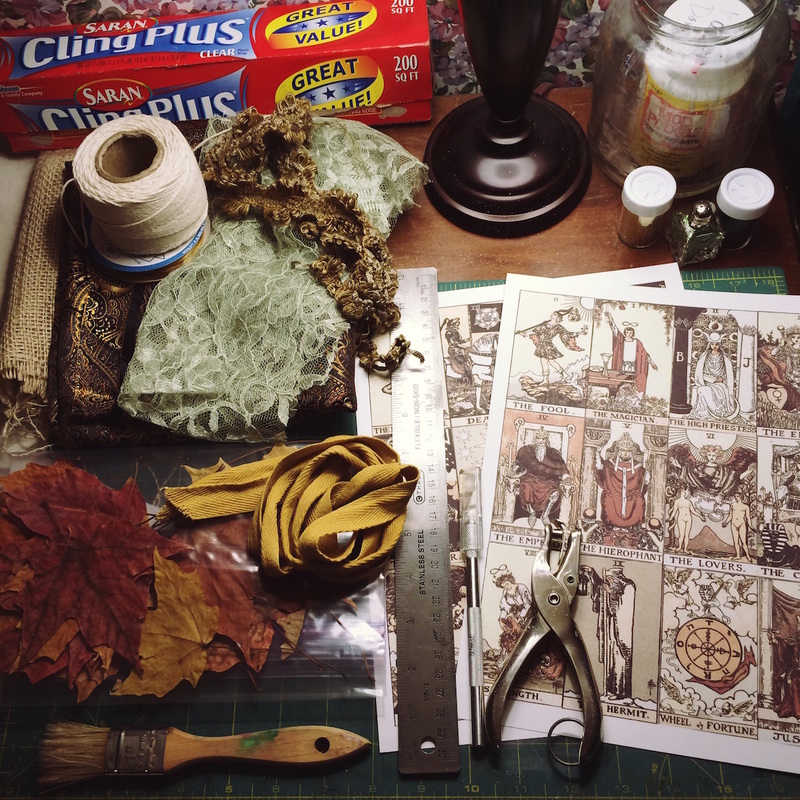
I operate on a shoe-string, so I designed this project to use up scraps I already had lying around the house. This project is super flexible. You don't have to use the same fabrics or ribbons as I do. You can easily substitute tools and supplies for things you have at home. All of the following materials are easy to handle and inexpensive to buy.
You Need:
1. A piece of ribbon, cut 12" longer than the desired length of your garland.
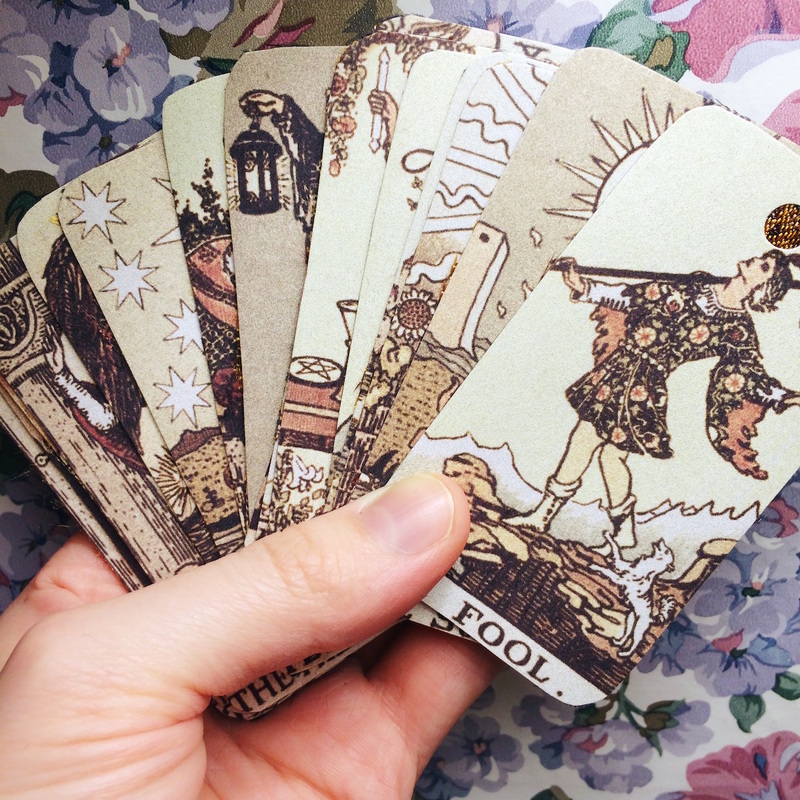
2. A scrap tarot deck, OR cardstock print-outs of the tarot majors.
3. An 18 x 12" scrap of fabric if you're printing cards without backs.
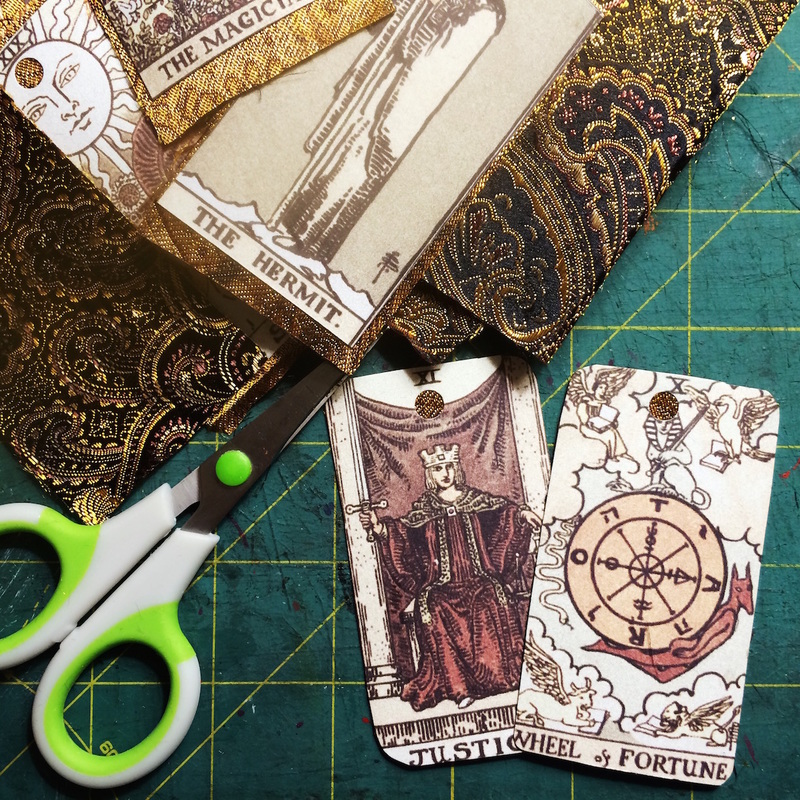
4. An exacto knife and metal ruler and/or craft scissors.
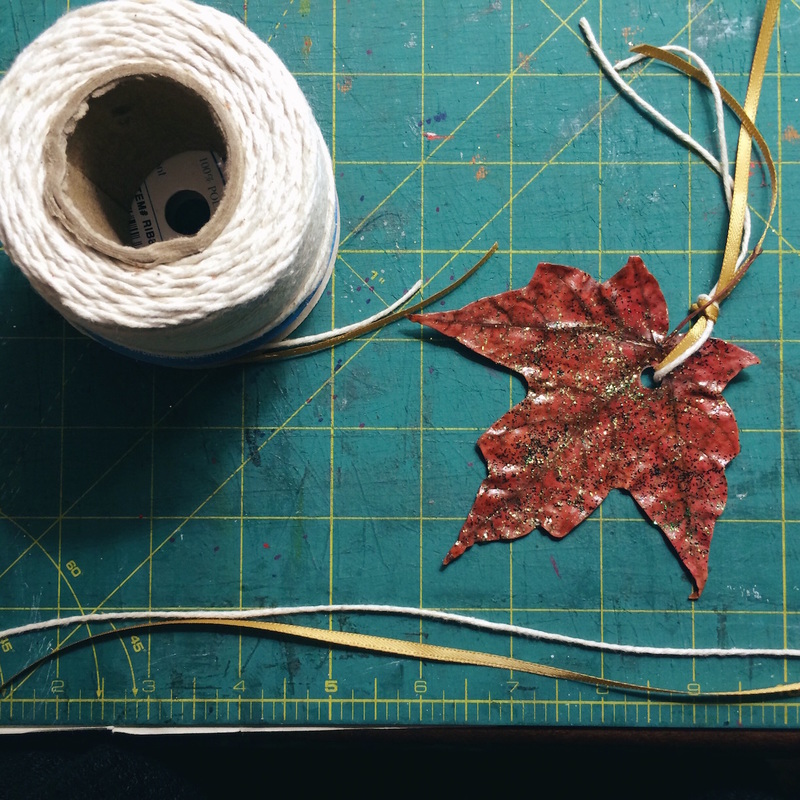
5. Dried, pressed fall leaves from your yard, or fake fall leaves from the craft store.
6. Matte finish mod-podge and a craft brush.
7. Glitter.
8. Saran wrap.
9. A single-hole punch.
10. A tapestry needle.
11. Ribbon and/or twine.
12. Fabric scraps.
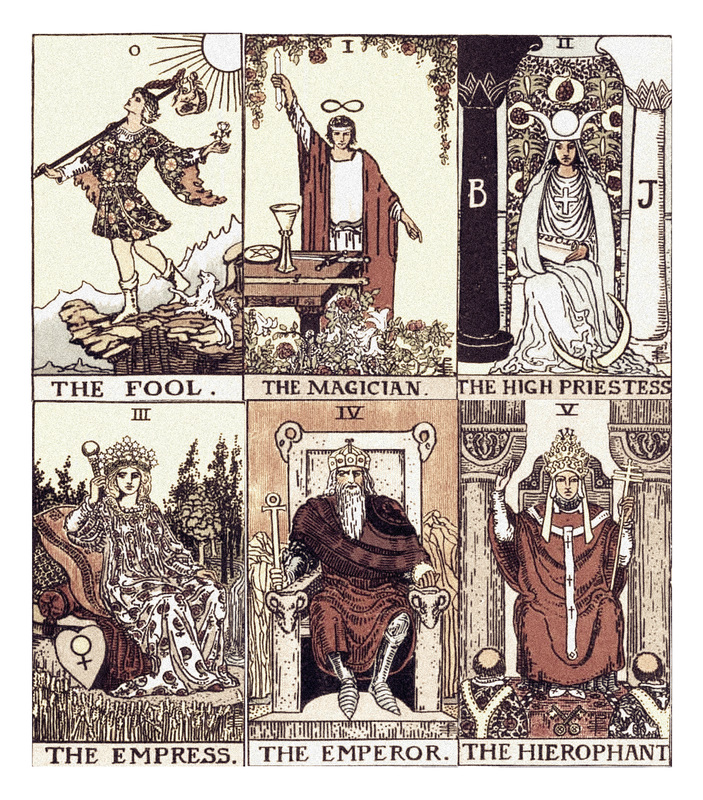
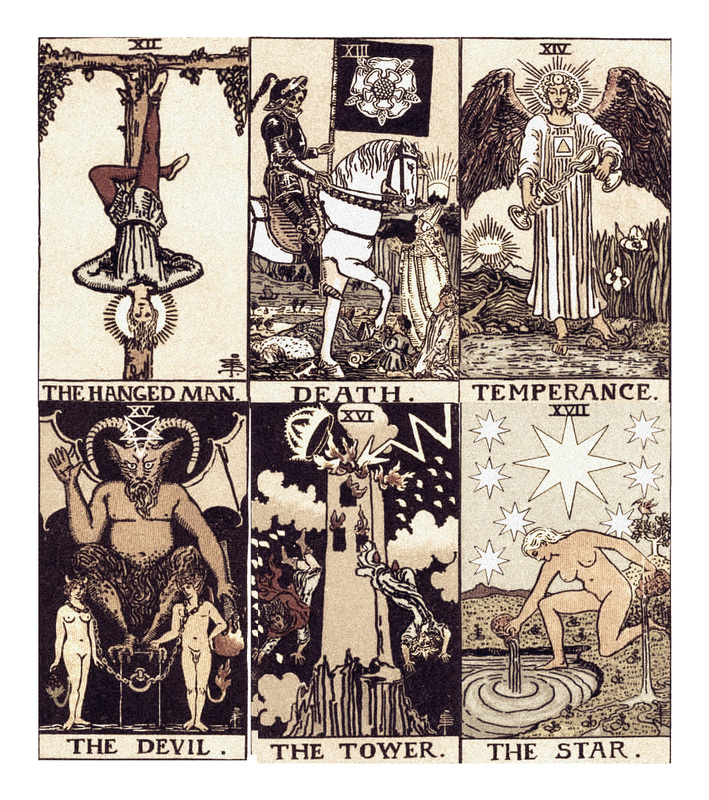
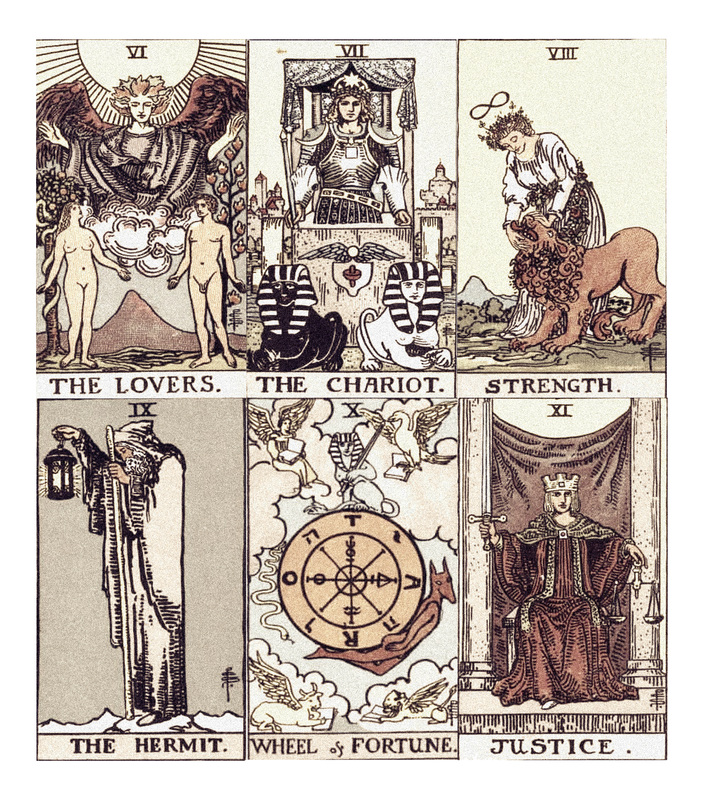
This is a great way to up-cycle an old deck that's missing cards. You will be punching holes in them, though, so opt for the print-outs if expense or desecration are concerns for you. Below are the images I used to make my prints for this project, sourced from A.E. Waite's The Pictorial Key To The Tarot on sacred-texts.com. I had to break them up onto four pages to upload them here.
  |   |
Prepare Your Tarot Cards:
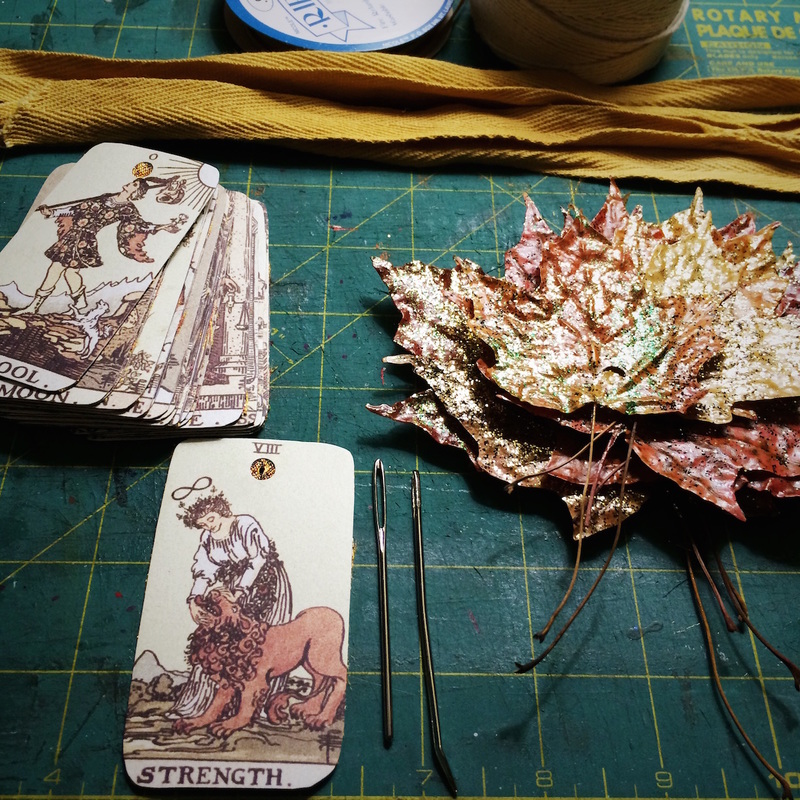
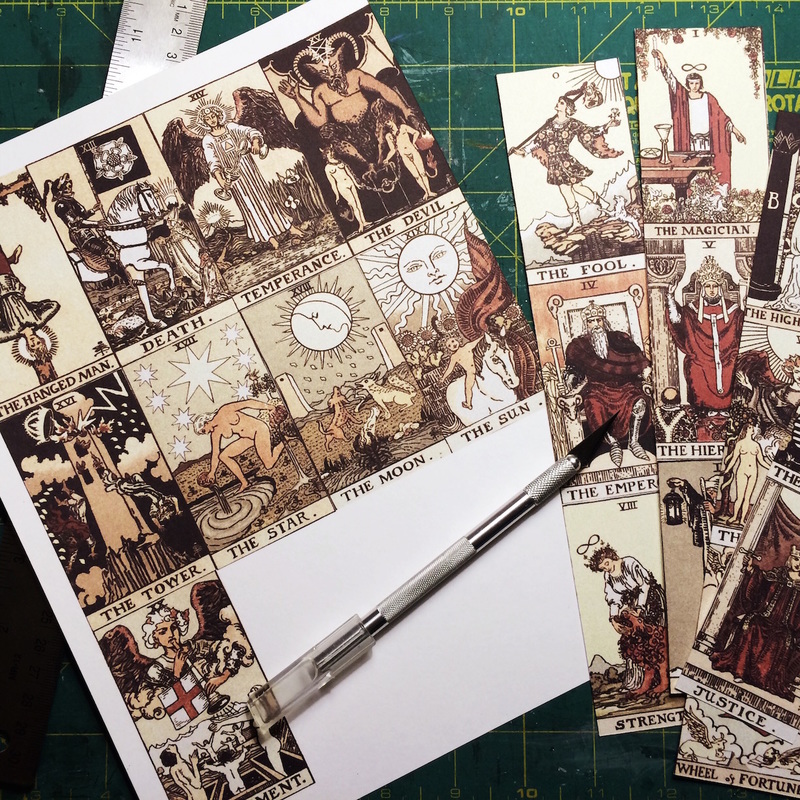 | If you're using an old tarot deck, skip ahead to step #3 1. Print your cards out on a heavy card-stock. Use the heaviest stock your printer will accept (some printers will only work with thin card-stock.) I recommend using a white or ivory colored paper. 2. Cut your cards out. |
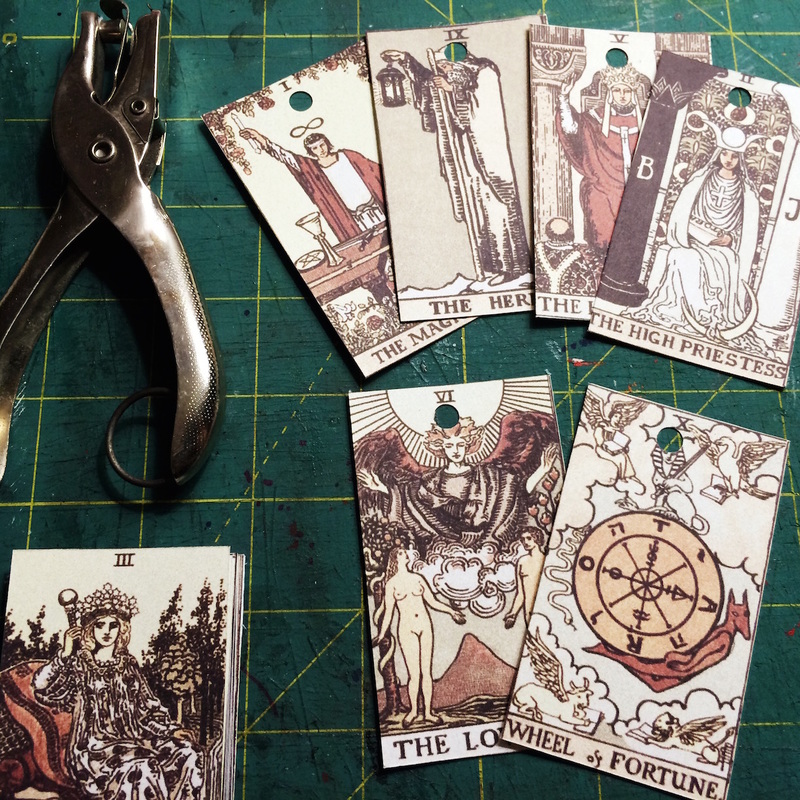 | 3. Punch a hole at the top of each card. If you're using an old tarot deck, or printed one of my decks with card backs, skip ahead to the leaves. If you're using the backless prints from this post, keep reading. |
 | 4. Cut out your card backing fabric, and glue each card down to the fabric with an even layer of matte finish mod-podge. 5. With a layer of saran wrap under and over your cards, press the cards flat with a heavy book for an hour or two. Then remove the saran wrap and allow the glue to dry completely. 6. Press the dried cards and fabric flat with a heavy book overnight. 7. Cut out your cards and round the corners with craft scissors. |
 |  |
Prepare Your Leaves:
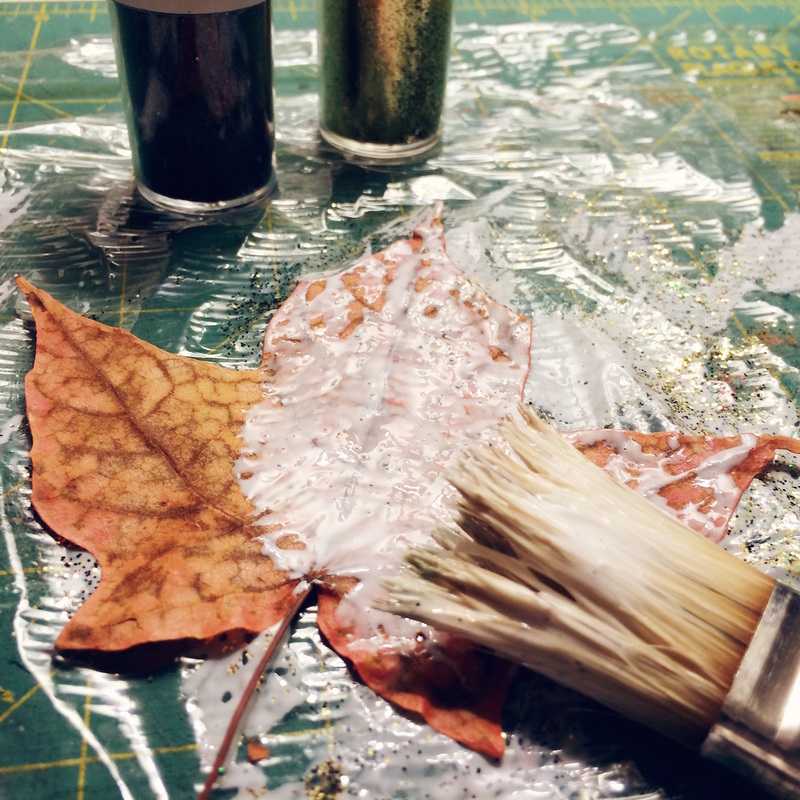 | 1. Use a sheet of plastic wrap to cover your workspace. This will get messy. 2. Coat the top side of each leaf with an even layer of matter finish mod-podge. Sprinkle with glitter. This doesn't just stick the glue to your leaves. It seals the leaves, making them less brittle and fragile. Coat the whole leaf, but don't glop on too much glue, or it will take forever to dry, and it will dry cloudy. |
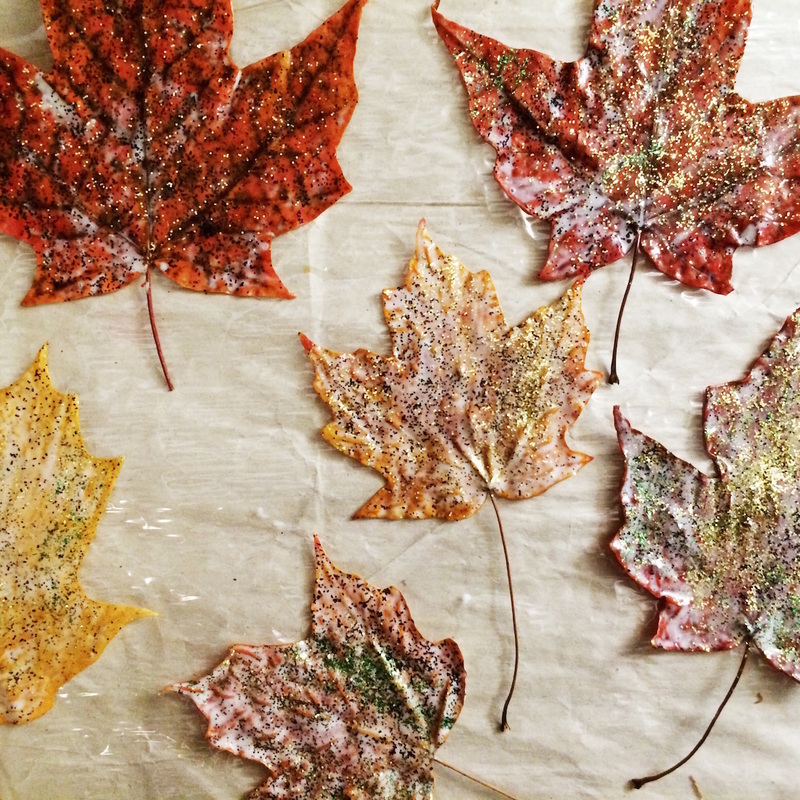 | 3. Set your leaves on a clean sheet of plastic wrap, and allow the tops to dry completely before you tackle the other side. Every 15-20 minutes, very carefully pick the leaves up and set them back down somewhere else on the plastic. This prevents them from drying stuck to the saran wrap, as they'll probably have little spots of glue on their backs. 4. Turn your dried leaves over and repeat the same process on the other side. Make sure that every spot of the leaf gets covered, to protect it from wear and tear. |
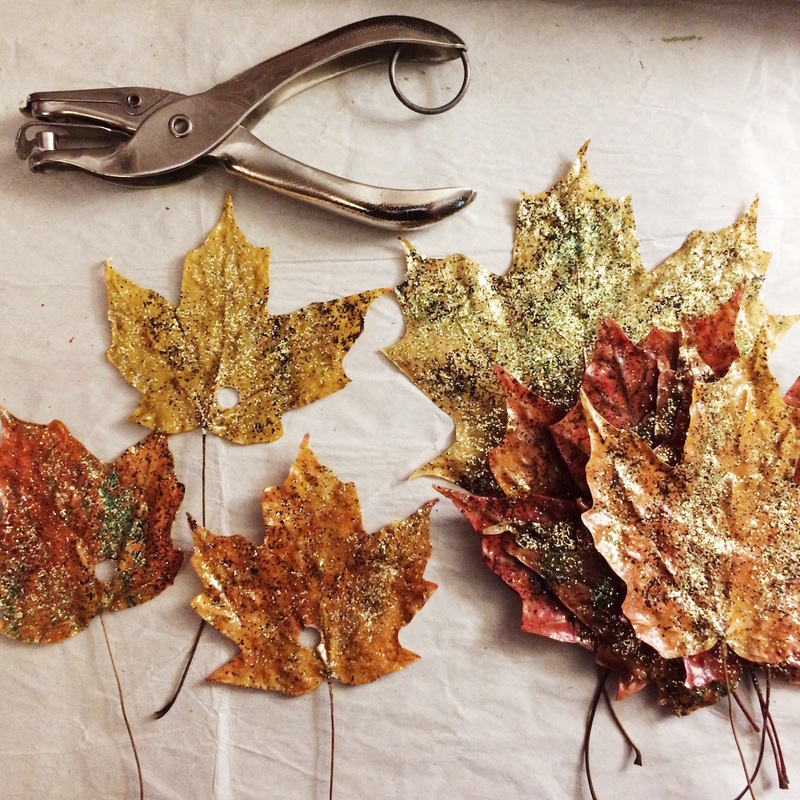 | 5. Punch a hole in each of your dry sparkle leaves. Try to punch right between the largest veins, close to the stem, but not too close to the edge. |
Putting it all Together:
 | 1. You're ready to assemble your garland! Get out your long, base ribbon, and some thin ribbon and twine to tie on the cards and leaves. 2. Tie a loop at each end of the base ribbon so you'll be able to hang your garland from the ends. |
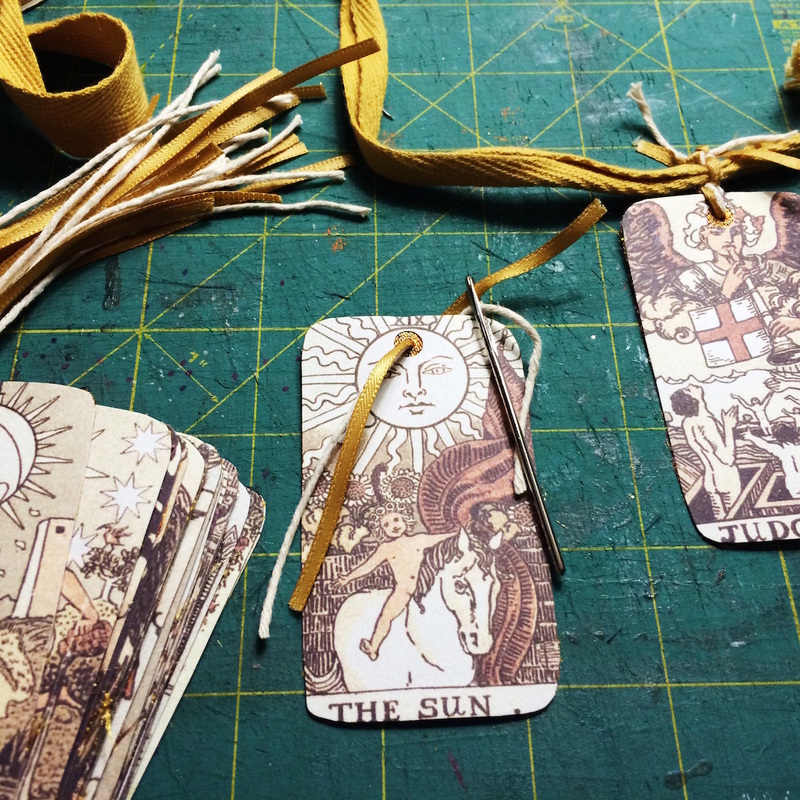 | 3. Cut out 22 pieces of 6" ribbon to attach your tarot cards. I liked the look of gold ribbon and cotton twine together, but you could easily pick one or the other. You can pick up kitchen string from the grocery store and cotton twine from the hardware store much cheaper than ribbon at a craft or fabric store, and it looks just as good. 4. Using a tapestry needle, thread your ribbon through the fabric in the hole of each card. You may need to use little fabric snips to start a hole in the fabric if it's a tight weave or if it got gluey. |
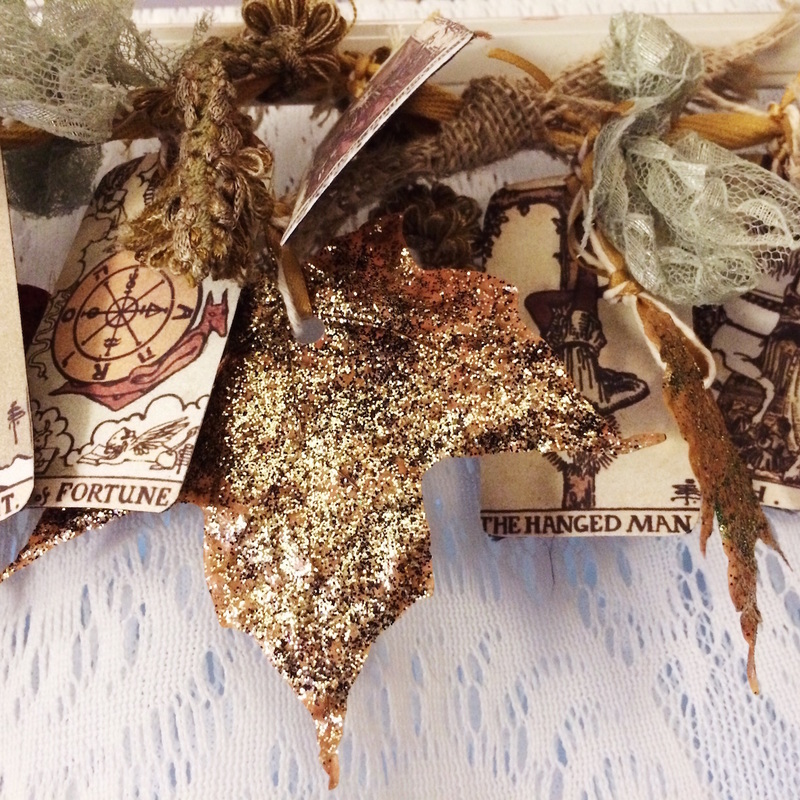
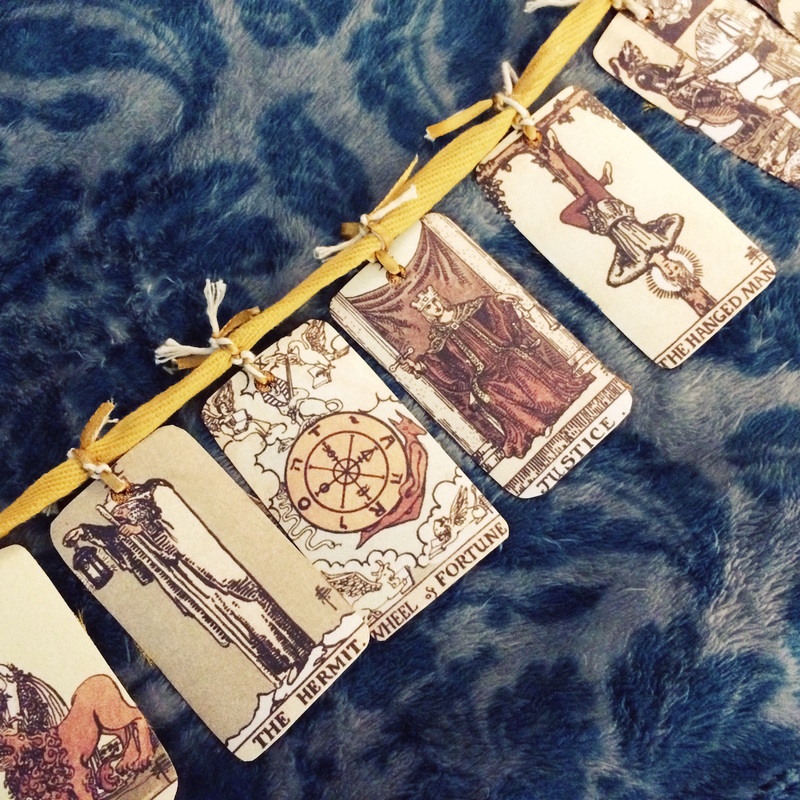 | 5. Make a knot at the top of each card, then tie each card onto your base ribbon with another knot. 6. Space each card evenly along the length of the ribbon. 7. Arrange your leaves evenly along the garland before you begin to tie them down. Alternate sizes as nicely as you can. |

 | 8. Cut 12" lengths of ribbon for tying your leaves onto the garland. 9. Thread the ribbon through, and tie a knot at the base of the leaf. Be really careful not to twist or break your leaves! This is the trickiest part. 10. Tie each leaf onto the garland with another knot at the top of the ribbon. Let the leaves hang a bit lower than the cards. |
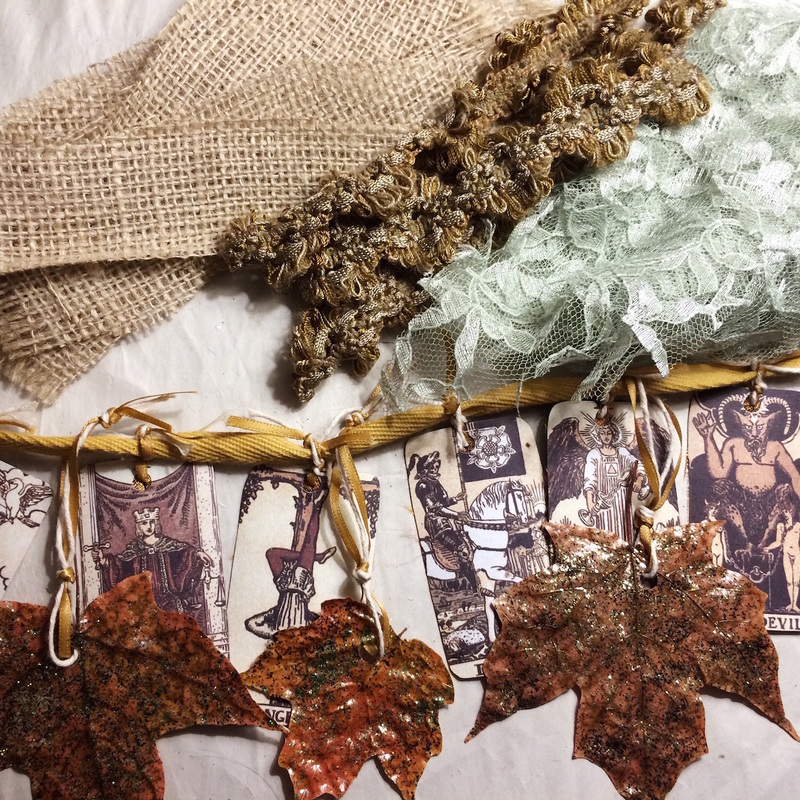
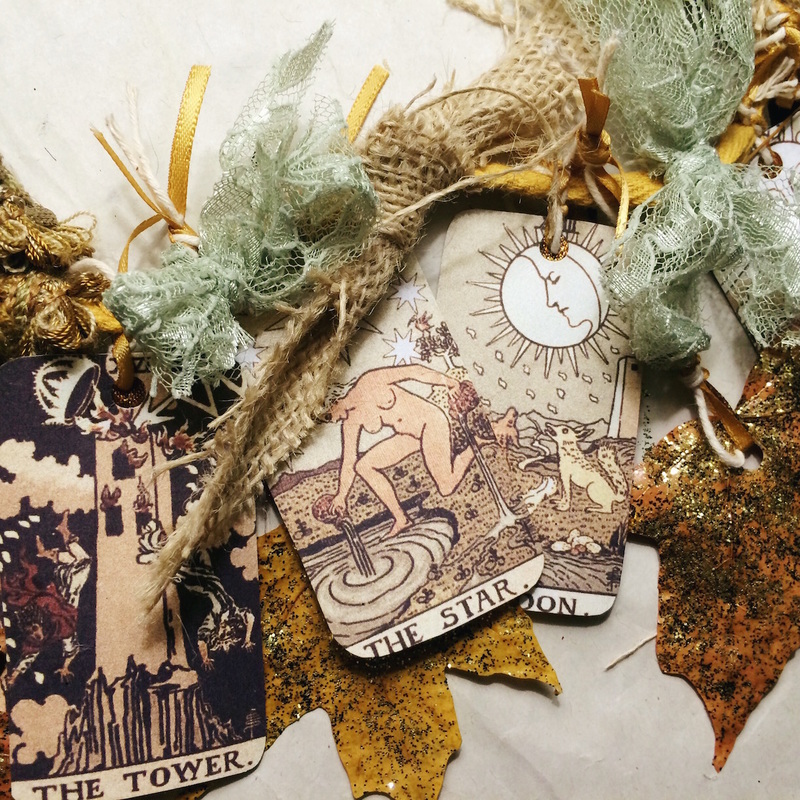 | 11. Cut strips of a few different scrap fabrics. I used burlap, lace, and scrap upholstery ribbon, because that's what I had lying around. If you don't have any fabric at home, you can find all kinds of fun patterns and textures in the remnant scraps at your nearest fabric store. Try to choose a couple fabrics with different textures. 12. Tie bows with your fabric strips along the top of the garland, between the cards and leaves. Alternate colors and textures, and fill out the garland as fully as possible. 13. You're done! Hang it somewhere pretty and enjoy! |
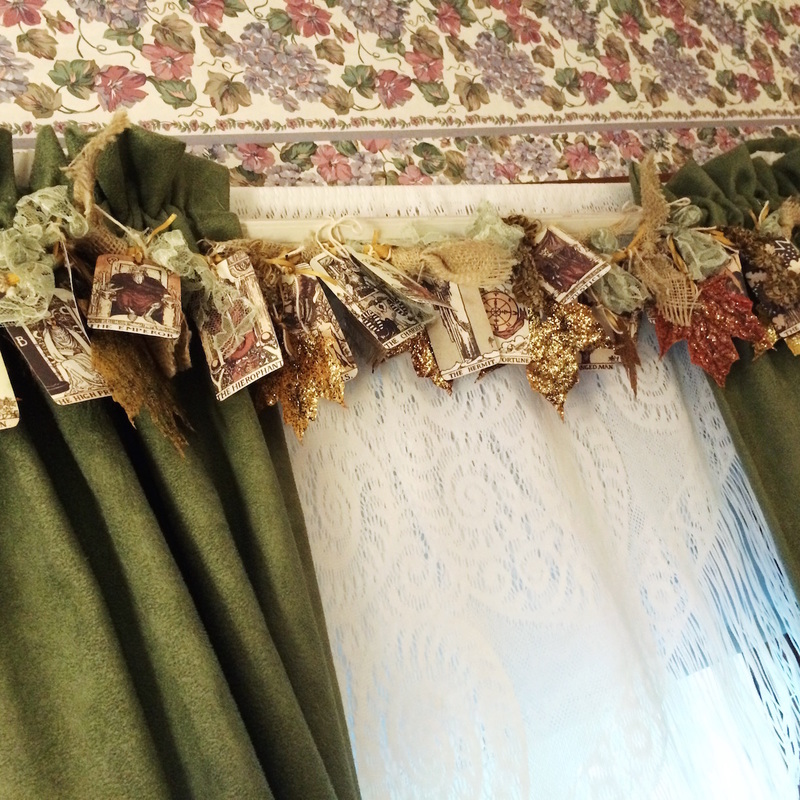 | 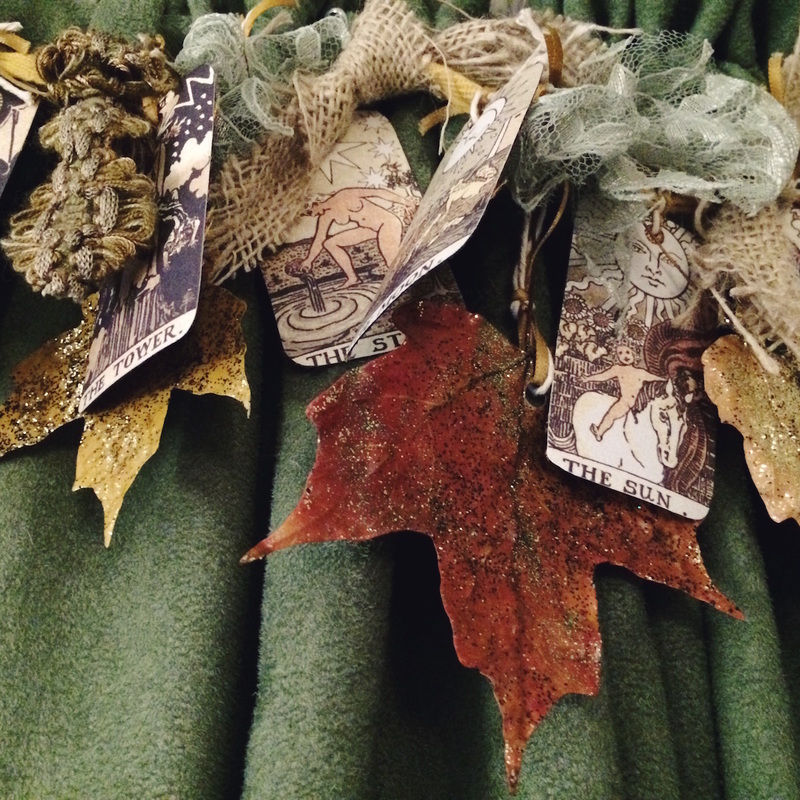 |


 RSS Feed